|
|
|
   |
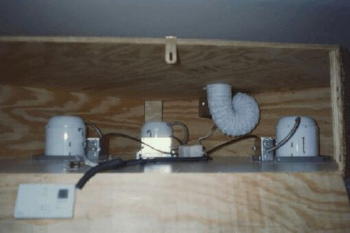
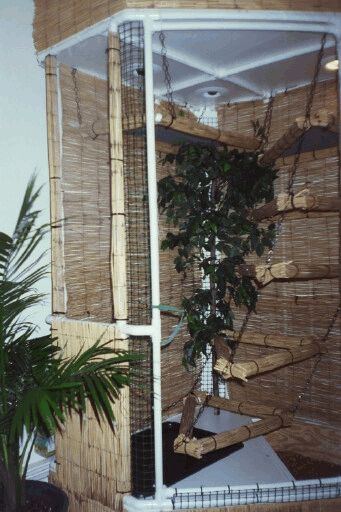
THE BIG JUNGLE GYM. Scott did an amazing job on the ceiling. Here's what Scott had to say about his modifications: "You can see I added a �cross� of PVC for support to the ceiling. Inside the top section, I put 3 recessed can lights (HALO-H7T) in the melamine and hardwired extension cords directly to them. My greatest concern for the can lights was the buildup of heat. It�s recommended to have at least 3� of open room around each can for risk of fire. A vent is connected to a low-noise bathroom fan I picked up at Home Depot. Now is where it gets fun! I�m a big electronics nut and I like this kind of stuff. In order for this to work, you need to get any household thermostat, with cooling capability, to regulate the heat. I recommend that whichever you choose, if you decide to go this route, to call tech-support to find out which wires to use for a simple cooling application. Here�s where it gets tricky. A standard household thermostat is designed for low voltage, usually 24-volts, but AC current out of the wall is 120-volts, so if you try to connect directly, you�ll probably see a bright light then smoke (in other words, you�ll fry it!) The trick here is to get: 1) a 120-volt to 24-volt Transformer (Radio Shack) and 2) a Relay with a 24-volt coil (you can get one of these at any electronics supply retailer.) The idea here is that the thermostat simply acts as a switch to kick on the fan to get the heat out of the enclosed area. Works like a charm! Here�s how it goes: the transformer has two leads: one goes to the relay coil and the other goes to the thermostat. Then, make the other wire from the thermostat go to the other end of the coil. Now, aside from that for a second, you will need a 120-volt, standard lamp cord, to allow enough voltage to power the fan. Cut the end to provide bare wires, or create your own using bulk cord and a plug. One end goes directly to the fan and the other goes to one �open� end on the relay (only cut one wire somewhere in the middle.) The relay has two �open� ends for the internal switch inside the relay that will soon kick the fan on and off. You will need another wire to go from the other �open� contact on the relay to the fan. I used some wire wrap (split black tubing) to cover the wires and added some zip ties with screw holes on them to secure into the melamine board. This completes your circuit. I recommend using a digital thermostat simply to specify an exact temperature to kick on your brand new cooling system. Oh yeah, also, I recommend using insulated connectors, especially if your relay needs �spade connectors.� Please, use your own discretion if you choose to build a cooling system for your cage. Mine works great but I�m no electrician. You may want to talk to an electrician before you proceed. Wow, Scott. Nice work! -Keith Questions? Read the FAQs or email me. Copyright
2002 Lizardcages.com |
"Hey Keith, thanx for all the help. You stood behind your plans and I really appreciated that. It was a lot of fun building the cage!"
|