|
|
|

Building the Jumbo Jungle Gym cage door
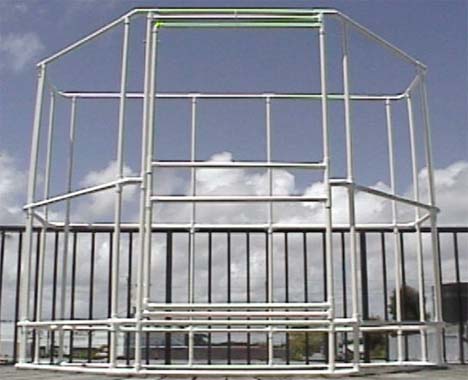
Now, we'll assemble the door, then push it all tightly together, and then attach it the frame.

Let's start building from the ground up...
Cut a pole [H] long and put a T on each end.
Put
two short [E]
poles into the Ts and put a 4-way connector
on top of each of the short poles, and put another [H]
pole across horizontally.
Now it get's a little trickier...
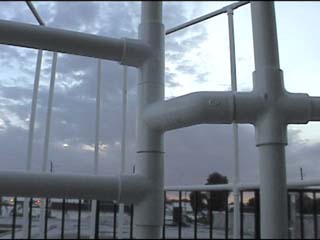
On the left side, put a [D] pole, then a T connector facing out (to the left - see where it attaches to the frame),
Then put a [C] pole on top of that, with a T connector at the ceiling level facing down.
Cut an [H] pole for the top horizontal and put a T on the other end - also facing down.
You've now got the door frame assembled -- and are ready to tackle the hinges and the doors themselves.
"Good job."
(Someone should congratulate you on completing the cage frame!).
The lower section of the
door is made up of two short [I]
vertical poles and two [J]
poles all
connected as shown with three Ts and one corner connector.
Notice the short pvc plugs sticking out of the right side Ts...
Be sure to push all those joints together tightly, before pushing in the short plugs.

Those
plugs in the right side Ts are slotted to make them work smoothly as hinges.

You can make the slots just by sawing into the plug once it's in the T.

The
top section of the door is
just like the bottom section - except upside down.
You
can construct it with two [K]
vertical poles and two [J]
horizontal poles,
all attached together with three Ts and one corner connector - as shown below.
Push
all the door joints tightly together -
then
install those right side plugs - and then
saw slots in them to make the door hinges work smoothly.

One
more thing: there's a small gap that needs to be filled between the
top and bottom sections of the door on the left side...
so
cut a [L]
pole and connect the door sections together.
On
the right side of the door, it works best to put the middle hinge together,
which is just a T in the middle facing out (to the right) and connected to the
frame.
The
top and bottom sections of the door - with their slotted plugs - are installed
into that middle T.
That's your middle hinge:
 .
.
The
final step is to make two bars that will fill in the space above and below the
door.
These bars are made with pvc poles cut to [M]
length and
capped with oversized T connectors (1x1x3/4) that have been trimmed to fit.
(One alternative option is to trim a couple of pieces of plastic gutter guards
to fill the openings around the door).

To pin the door shut
with 3" bolts, I drill a couple of holes in the left side of the door,
near the top and bottom.
The nuts aren't really necessary, because the bolts will definitely keep the
door pinned shut.
However, if you have any concerns about cage intrusions of the human
variety,
you may want to put a locking clasp on the door.

Now that you have a cage
frame and door completed,
let's cover it with plastic mesh to make our cage functional right now!
To do that, all we have to do is cable tie mesh around the frame.
Then we'll add a raised mesh floor, a ceiling, and some nice shelves...
But first, let's cover the frame with plastic mesh (it's fun!) --- >>>
.....
Introduction | The Plans | The Cages | Q&A
Copyright 2003 Lizardcages.com
All rights reserved.
